I’ve been playing with the new Mirrix Chloe loom for several months now and I’ve had a lot of people asking me about it in my online courses and on social media. The Chloe loom is the new version of the Saffron Pocket Loom. The Saffron came out with in 2020 and I reviewed it HERE.
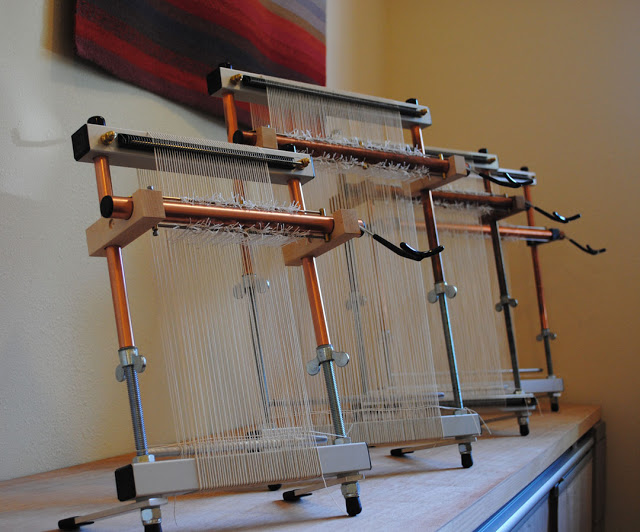
The Chloe loom uses the square bars that are standard on Mirrix’s bigger looms for a lap-sized loom with one tensioning bar in the middle.
I use the Saffron loom a lot for samples and teaching and honestly, I didn’t see any need at all for a new version of this loom, but I will admit to all of you, that…
I have grown quite a collection of small looms over the last few years. I have some favorites and you can see some of them in THIS blog post. But the new kid on the block is definitely Mirrix’s Saffron Pocket Loom.
….
This loom is small. And it comes apart into 3 pieces—the top, bottom, and threaded rod. For most people that might not be noteworthy, but in my life before coronavirus, I traveled a lot. My suitcase space when I’m traveling to teach is precious and bringing multiple small looms actually takes up quite a bit of room. The Saffron is tiny when disassembled which immediately led me to think that maybe I COULD provide small looms for relevant workshops now. Because I could fit 12 of these in a suitcase with no problem. I love this aspect of this loom.
But the real beauty of this loom is that it has tensioning. I don’t know of any other loom this small that provides a tensioned warp. This loom does it really well through a simple threaded rod. After warping, the tension can be increased by simply loosening the top nut and tightening the one under the top bar of the loom. When final tension is achieved, the top nut can be snugged up against the top bar and you have excellent tension. I never thought I’d see a loom of this size with adjustable tension. Being able to adjust the tension on a small piece is so wonderful.
Okay, many of these hacks refer to warping a Mirrix loom. But most of my students are using them and these are the questions I see come up again and again. A few of these ideas apply to any tapestry loom.
The video below shows some of the things I do to make warping this loom easier. It isn't a hard loom to warp, it is just different than the big floor looms many of us are used to. There are no warping boards in Mirrix-land.
Here are some of the points I cover in this video.
Leave at least three inches of threaded rod for stability. You don't even want to know what happens when you don't do this.
Which direction do I start warping, up or down? I know you're on the edge of your seats waiting for the answer for that one!
How to keep warps from getting twisted with their neighbors. (no alcohol is involved here--and can I just say that if this particular thing drives you nutty, just buy the bottom spring for your loom. Seriously.)
Double selvedge warps. I'm not the only one who does this... and I love it!
Using a guide thread. Nope, I don't do this, but it can be helpful if you struggle with your selvedges or weft tension.
Moving the warping bar down. Don't forget to do this... or your warp will be much shorter!
How to put the heddles on without throwing the loom through a window. To be honest, I like putting heddles on the Mirrix. The texsolv heddles are wonderful and somehow I don't have trouble seeing the pattern or getting them on without mistakes. Of course that could also just be because I've warped a lot of these looms. Don't resort to violence (I always advocate a glass of wine if you're allowed). Here are some easy hacks to help.
Block the second layer of warp from view. So easy. So helpful. Just do it. I like gray but any color works.
As usual, if you receive this blog post via email, you need to visit my blog in your internet browser to see the video. Go to http://rebeccamezoff.blogspot.com. Or go see it on my YouTube channel and subscribe while you're there!
My last tip is that perhaps we all need a studio assistant as helpful as Topaz.